
If you are setting up a hospital bed for home, the assembly time and complexity will vary depending on the model. An important factor to consider is the weight of hospital beds.
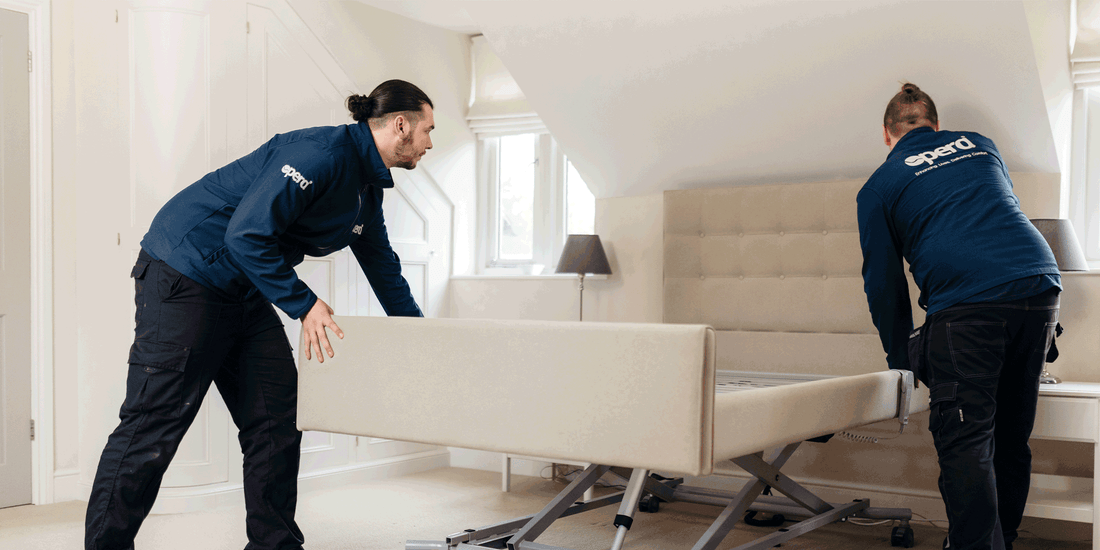
Unlike a regular bed, these types of beds can be heavy due to their metal chassis, so we advise having someone to help you install the bed. Alternatively, we provide a home installation service where our trained engineers will fully assemble any Opera hospital bed.
In this article, we’ll explain how to set up a selection of our most popular hospital beds, as well as how to maintain them at home.
Before Assembly
Before setting up an Opera hospital bed, we advise checking the space to make sure the bed will fit. These beds have a profiling mattress platform as well as height adjustment, so it’s important to assess whether your bedroom is suitable to accommodate a profiling bed.
As mentioned previously, we recommend that two people unpack and install any Opera hospital bed to avoid injury. If you are self-installing the bed and have chosen our courier pallet delivery service, the hospital bed will be delivered as close to the property as possible. This means you will be responsible for bringing the bed inside using the transport trolley provided.
Tools and Materials Required
Before assembling an Opera hospital bed, check you have the following:
- Wall space with a plug socket nearby
- 4mm and 6mm Allen key
- A crosshead screwdriver
- Pair of scissors
How to Install Your Opera Classic Profiling Bed
All Opera profiling beds come with instructions for use (IFU) with step by steps to follow. We also have a series of installation videos if you prefer visual instructions.
Step 1- Position the bed
Move the bed into the centre of the room and remove all the packaging from the bed. Place the side rail box to one side.
Step 2 - Place the accessories to one side
Detach the accessories and place them to one side. These will be:
- 8x side rail end caps
Step 3 - Remove the mattress platforms
With two people, carefully hold the backrest mattress platform at both ends and pull it up and out of the transport bracket.
Carefully place to one side with the actuator on top. Repeat these steps to remove the leg rest mattress platform from the transport bracket.
Attention: The mattress platforms are heavy, please observe the general rules of manual handling to prevent strain and injury.
Step 4 - Position the head and footboard
Move the head/footboards over towards a wall. Position so that one of the head/footboards is placed against the wall (this will become the headboard).
Apply the brakes on the two castors of the headboard. Push down on the brake pedal to brake/lock the castors.
Step 5 - Detach the transport bracket
Release the two securing bolts on the transport bracket by pulling out the bolt. The securing bolts are located on the inside frame of the head/footboards, with one at each side.
Step 6 - Detach the head and footboards
With two hands at either side of the board (the one that is not against the wall) carefully lift it up and out of the transport bracket. Place this to one side, this will become the footboard of the bed.
Repeat the steps above to remove the headboard, place the headboard against the wall and place the detached transport bracket on one side.
Step 7 - Secure the actuator motors
Lay down the mattress leg rest platform with the actuator motor facing upwards. On the actuator securing bracket pull back the metal guard and remove the pin. Align the holes in the actuator to the bracket (this is where the pin was).
Insert the pin through the holes and pull the metal guard back over the pin to secure the actuator in place. Repeat for the mattress backrest platform.
Step 8 - Attach the headboard to the back rest
Place the mattress backrest platform down in front of that headrest.
Slide the metal prongs (with the two holes in) on the mattress platform side channels of the mattress backrest platform into the metal plates on the headboard.
Secure the headboard to the mattress backrest platform with the securing bolts. Push the securing bolts back through the headboard’s metal prongs and into the mattress backrest platform prongs.
Step 9 - Connect the mattress platforms
Feed the metal prongs on the mattress backrest platform into the mattress platform side channels of the mattress legrest platform until the platforms are joined.
Make sure that the actuator on the mattress legrest platform is at the centre of the bed, located near the control box
Secure the platforms together by tightening the black thumb screws on the mattress legrest platform.
Step 10 - Attach the footboard
Follow step 7 to attach the footboard to the end of the mattress legrest platform.
Step 11 - Remove the cable ties
Using a pair of scissors, carefully remove the cable ties from the actuator motors, handset, and the mattress platform. Ensure that no wires are cut or damaged during this step.
Step 12 - Plug in the actuators
Lift the backrest profiling section fully up, this should remain upright without support, giving you access to the control box.
Remove the control box cover with a crosshead screwdriver.
Plug in all four actuator cables into the correct colour-coded sockets, plug the handset control in and replace the control box cover.
Step 13 - Fit the side rail end caps
Unpack the side rails from their box. Lay all four side rails on the floor.
Fit the plastic end caps to both ends of the individual side rails. To do this use the bottom of the side rail as a leading edge and push on the cap.
Step 14 - Fit the side rails to the headboard
At the head of the bed, press down on the triangular latch in the side rail runner channel to release the side rail runner.
Fit the wooden side rails onto the side rail runner by sliding the rail runners all the way into the side rail end caps and into the wood of the side rails. The side rail runners go into the top and bottom holes of the side rail end caps.
Step 15 - Fit the side rails to the footboard
Release the black securing bolts that secure the footboard to the mattress legrest platform and pull the footboard slightly away.
Repeat step 14 to fit the side rails to the footboard.
Slide the footboard back into the mattress platform mounting channels and secure it with the black securing bolts.
Step 16 - Secure the side rail channels
Tighten the side rail channel fixing bolts (circled) with a crosshead screwdriver. The fixing bolts go through the bottom of the side rail channels at both sides of the head and footboards, securing the side rail runners in place.
To detach the side rails, remove the side rail channel fixing bolt, as you remove the bolt make sure to hold the side rails to prevent them from dropping out onto the floor.
To replace the side rails, slide the runners back into the side rail channels. The footboard may need to be removed as per step 15 to fit the side rails back onto the footboard. After replacing the side rails, secure the side rails with the side rail channel fixing bolts.
Step 17- Clip on the mattress retainers
Clip in place the mattress retainers, 2 slats down from the top of the backrest, and 2 slats up from the bottom of the leg rest.
Repeat for the other side of the bed.
Step 18 - Test the features of the hospital bed using the hand control.
Perform the following steps:
- Activate the height adjustment
- Raise the back rest up and down
- Raise and lower the leg rest section
- Test the tilt feature in both directions
- Test that the bed lowers down to its lowest position
Attention: Ensure that there are no cables caught when adjusting the bed height.
Before lowering the bed check that the area underneath is clear, any obstructions could damage the bed.
Step 19 - Position the bed
Move the bed into the desired position and plug it into a mains socket. Ensure you unbrake the castors before moving. Position the bed and apply the brakes on all the castors.
Place the mattress onto the bed, making sure it is secure and all the mattress holders are in place.
Assembly Complete
How to Install Your Opera Signature Comfort Profiling Bed
If you are installing the Opera Signature Comfort profiling bed yourself, here are the instructions for assembly. If you prefer, watch our step-by-step instruction video.
Before Assembly
Check you have all the contents before assembling the hospital bed. You should have the following:
- Head and footboard
- Mattress fixing bolts
- Side skirts
- Side skirt fixing bolts and insert nuts
- Side rail channel fixing bolt
- Chassis securing bolt
- Hand control
- Mattress back rest platform
- Mattress leg rest platform
- Bed chassis
- 4x mattress retainers
- Power transformer
How to Assemble
Step 1- Position the bed
Move the bed into the centre of the room. Place the side rail and side skirt boxes to one side.
Step 2 - Place all the accessories over to one side
Detach the accessories and place to the side.
These will be:
- Mattress Platform Securing Bolt x 16
- Side Skirt Fixing Bolt and Insert Nut x 8
- Chassis Securing Bolt x 4
Step 3 - Remove Head/Foot Boards and Mattress Platforms from the Transportation Bracket
Loosen the thumb screws on each side of the transportation bracket and slide the head and foot boards out of the bracket.
Place the detached boards to one side. Lift the mattress platform sections out of the transportation bracket, and place these to one side with the actuator motors facing up/on top of the sections.
Attention: The bed parts are heavy, please observe the general rules of manual handling to prevent strain and injury.
Step 4 - Position the bed chassis
With two people lower the bed chassis down onto the floor.
Next, carefully lift the chassis off the transportation bracket and place it down. Move the transportation bracket to one side.
Once the chassis is positioned, brake all four castors of the chassis by pressing down on the brake pedals.
Attention: The bed chassis is heavy, please observe the general rules of manual handling to prevent strain and injury.
Step 5 - Secure the actuator motor
Lay down the mattress leg rest platform with the actuator motor facing up. On the actuator securing bracket pull back the metal guard and remove the pin.
Align the holes in the actuator to the bracket (this is where the pin was). Insert the pin through the holes and pull the metal guard back over the pin to secure the actuator in place. Repeat for the mattress backrest platform.
Step 6 - Place the backrest mattress platform on the bed chassis
Lift the mattress backrest platform onto the head end of the bed chassis. Ensure that the mattress backrest platform is not placed above the height adjustment actuator/motor on the chassis.
Position the mattress backrest platform so that the securing bar at the head end of the chassis is placed into the U bracket of the backrest.
Attention: Do not place the mattress platform backrest section over the actuator/motor on the bed chassis.
Step 7 - Fix the backrest mattress platform
Manually lift the mattress backrest platform to access the pre-drilled holes in the security bar of the chassis and the U bracket of the mattress back rest platform.
Feed the chassis securing bolts into the holes and through to the chassis, tighten with a 6mm Allen key.
Repeat this on the other side of the bed.
Step 8 - Plug in the actuators to raise the bed
Plug in the height adjustment actuator, backrest actuator and handset into the correct colour-coded sections of the control box. The control box is under the mattress backrest platform.
Step 9 - Raise the bed
Plug the bed into the main power and raise the bed using the handset control. Raise the bed up to a safe working height.
Attention: Ensure that there are no cables caught in the scissor-action mechanism when adjusting the bed height.
Step 10 - Connect the mattress platform and secure the leg rest section
Lift the mattress leg rest platform onto the chassis. Align the metal prongs in the mattress leg rest platform to the channels in the mattress backrest section. Feed the metal prongs into the channels until the mattress platform sections are joined.
Make sure that the mattress leg rest platform is placed on the securing bar and tighten the mattress platform securing bolts to secure the mattress platforms together.
After this, repeat the process in step 7 to secure the leg rest mattress platform to the chassis.
Step 11 - Connect the remaining actuator
Plug the leg rest actuator into the control box. Take two crosshead screws and attach the control box cover to the control box, with a crosshead screwdriver.
Step 12 - Attach the head and footboards
Lift the headboard so that the two metal mounting brackets at either side are in line with the two channels at the head end of the mattress platform.
Slide the metal mounting brackets in until the headboard is aligned with the mattress platform.
Secure the headboard in place with the mattress platform securing bolts and tighten with a 6mm Allen key.
Repeat these steps to attach the footboard.
Step 13 - Attach the side skirts
Unpack the two comfort side skirts. Use the handset to lift up the mattress backrest platform and the mattress leg rest platforms to access the pre-drilled holes that are on the inside of the mattress platform side channel.
Line up the four holes in the side skirts to the four holes inside of the mattress platform side channels. Using the side skirt fixing bolts and a 4mm Allen key, insert all 8 bolts into the side skirts from the inside of the bed, tighten the side skirt fixing bolts when all bolts are in place.
Repeat step 12 to attach the head and footboards.
Step 14 - Clip on the mattress retainers
Clip in place the mattress retainers, 2 slats down from the top of the backrest, and 2 slats up from the bottom of the leg rest.
Repeat for the other side of the bed.
Step 15 - Test the features of the bed
Test that each feature of the hospital bed is working properly. Perform the following steps:
- Test the height adjustment feature (the whole bed should raise up and lower down)
- Raise and lower the backrest section
- Raise and lower the leg rest section
Attention: Ensure that there are no cables caught in the scissor-action mechanism when adjusting the bed height
Step 16 - Position the bed in place
Move the bed into the desired position (unbrake the castors before moving). Position the bed and apply the brakes to the castors.
Place the mattress onto the bed, make sure that the mattress is secure and all mattress holders are in place.
Assembly complete
Enhancing Your Sleep in an Opera Hospital Bed
Profiling care beds, or hospital beds are a great investment for the home, particularly if you or a loved one have a disability, limited mobility or care needs. As well as providing a range of customised positions, hospital beds have special features designed to make care easier and enhance quality of life.
Additional accessories are available for an Opera profiling bed, which can provide added comfort and regain independence.
Is Your Mattress Right for You?
Ensuring you have the right mattress is essential for getting the best use out of your hospital bed. Unlike regular mattresses, hospital bed mattresses can conform when the bed is profiled.
At Opera Beds, we provide two types of mattresses that are all compatible to work on an Opera profiling bed. Our range of comfort mattresses includes various fillings from supportive foam to luxury wool. Our pressure care mattresses are designed to prevent and treat pressure sores and include different types from static foam to air therapy.

Our team of experts can find the best mattress if you are unsure, start by getting in touch. If you are using an existing mattress on your Opera hospital bed, we recommend checking with the manufacturer beforehand to see if it is suitable.
Added Extras for Your Profiling Bed
Investing in an Opera profiling bed makes life easier, particularly for those with a medical condition or limited mobility. Whilst they are a great way to restore independence by themselves, opting for accessories for your profiling bed can provide even more comfort and support.
Grab Rails
Grab rails provide extra stability and support when getting in and out of bed. If you or a loved one has poor balance or physical weakness, installing a grab rail to your profiling bed can help.
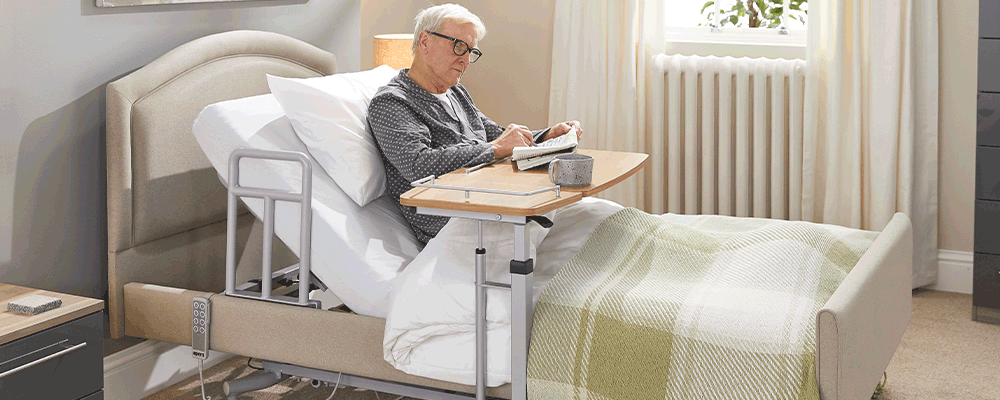
Overbed tables
Another accessory to enhance comfort with a hospital bed is an overbed table. As the name suggests, an overbed table sits over the bed and provides a handy surface when inside the bed. Using an overbed table is easier when eating and reading as they can be height adjustable. Meanwhile, they usually have castors for easy manoeuvrability and have a wipe-clean top.
Looking After Your Opera Hospital Bed
All Opera hospital beds come with a peace-of-mind warranty and are eligible for an upgrade if you’d like extra cover. However, it’s important to look after your profiling bed for user well-being and safety.
Here are a few ways to maintain your hospital bed to keep its longevity:
- Ensure the weight restriction is adhered to: Exceeding the maximum weight capacity on a profiling bed can cause damage.
- Lubrication: Lubricate moving parts, such as castors and adjustable mechanisms, to ensure smooth operation and prevent unnecessary wear and tear.
- Inspections: Conduct routine inspections to identify any loose or damaged parts. Replace or repair these components promptly to avoid accidents or injuries.